How to Safely Complete Flooring Removal


Removing old flooring can seem like a daunting task, especially when you're planning to replace it with something fresh and new. Whether you're upgrading your home, preparing for a renovation, or simply looking to refresh a space, understanding how to safely complete the flooring removal process is crucial. Proper planning and execution ensure that the job is done efficiently and with minimal risk to both you and your home.
Not to mention, incorrect removal techniques can affect the new flooring installation, causing further complications. Whether you’re dealing with carpet, tile, laminate, or hardwood, the key is to approach the task with the right tools, technique, and safety precautions in place. By following a well-thought-out plan and taking the necessary precautions, you can avoid these pitfalls and successfully complete the flooring removal process with ease.
Understanding Flooring Types and Challenges
Before jumping into the removal process, it’s important to understand the different types of flooring you may be dealing with. The materials and methods for removal vary widely between carpet, hardwood, laminate, tile, and vinyl. Each type requires specific techniques and tools to avoid mishaps. For instance, removing a carpet might seem simple, but hidden staples and adhesive can make the process trickier than expected. On the other hand, removing tile may involve heavy lifting, while hardwood requires careful consideration of the subfloor to avoid damage.
The first step in any successful flooring removal is assessing the type of flooring you have. Once you know what you're working with, you can better prepare for the appropriate steps. You wouldn’t attempt to pull up ceramic tiles the same way you would lift carpet, after all.
Gathering the Right Tools
The success of any project hinges on the right tools. When removing flooring, having the correct equipment on hand not only speeds up the process but also ensures that you do the job safely. For carpet removal, a utility knife, pliers, and a pry bar are essential for cutting and pulling up the fabric. For hardwood floors, a crowbar, hammer, and perhaps even a reciprocating saw for stubborn boards are necessary. Tile removal may require a heavy-duty tile scraper or floor scraper, a hammer, and a chisel to break up the tiles.
Additionally, a heat gun can be helpful for removing stubborn adhesives that often accompany older flooring. If you’re dealing with glue-down vinyl or laminate flooring, expect to need a floor scraper or adhesive remover, along with safety goggles and gloves for extra protection. No matter the flooring type, safety gear is paramount—always have a pair of work gloves and goggles at the very least. For particularly tough jobs, knee pads and ear protection may also come in handy.
Prepping the Space
Before you get down to removing the flooring, there’s some preliminary work that needs to be done. Start by clearing the room of all furniture, fixtures, and smaller items. A clean workspace will prevent injuries and keep debris from getting caught underfoot. Next, inspect the room for any obstacles that could complicate the flooring removal process. If you’re working in a room with low ceilings or tight spaces, it’s important to be cautious of sharp edges and overhead obstacles.
If you’re removing flooring in a room with built-in cabinetry, consider whether it’s easier to remove the cabinetry first or work around it. If you're working with wood flooring, be aware of nails and staples that can be hazardous if stepped on. Take the time to remove these ahead of time or ensure they’re dealt with safely during the removal process. For tile flooring, it’s best to score the tiles along the grout lines with a utility knife to make breaking the tiles easier and less chaotic.
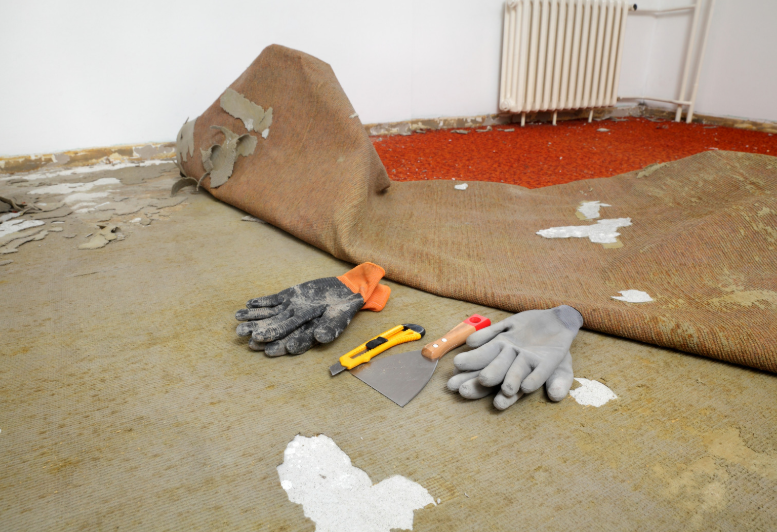
Removing Carpet Flooring
Carpet removal is often one of the first steps in flooring renovation. It can be less physically demanding than removing other types of flooring, but it does require some precision. Start by cutting the carpet into manageable sections using a utility knife. Work from one corner of the room and cut along the edges to free the carpet from the tacking strips that hold it in place.
Once the carpet is cut into strips, pull it up, starting at one corner, and roll it up as you go. If the carpet is particularly stuck, using a pry bar can help lift it from the tacks. Once the carpet is out, you’ll be left with the underlayment or padding. This material can often be pulled up easily, but if there’s adhesive used to secure it, a little extra elbow grease may be needed. Make sure to remove any remaining nails, staples, or adhesive before moving on to the next phase.
Hardwood Flooring Removal
Removing hardwood floors is a bit more intensive and requires extra care. Hardwood planks are generally nailed down or stapled, and these fasteners need to be removed in order to lift the planks from the subfloor. Begin by using a crowbar to pry up the edges of the first few planks. Be cautious not to damage the subfloor beneath. If you're dealing with tongue-and-groove hardwood, you may need to remove the nails or staples at the edges and then pry each plank loose.
If the boards are stubborn, a reciprocating saw can help loosen them with minimal damage to the subfloor. Take extra care to avoid damaging the underlying wood. If you're planning to reuse the hardwood, the goal is to keep the boards intact and free of damage. Additionally, make sure to carefully collect any nails or other fasteners to prevent injury or damage to the subfloor.
Tile Flooring Removal
Tile floors, especially those that have been in place for years, can be one of the most challenging types of flooring to remove. The process begins with scoring the tiles along their grout lines using a utility knife. This initial step helps create a break in the tile, making it easier to remove. Once the tiles are scored, a floor scraper or chisel can be used to gently pry the tiles apart. Start at one corner or edge of the room and work your way across, using a hammer and chisel to lift the tiles off the adhesive or mortar.
It’s important to approach this task carefully, as tile pieces can be sharp and may cause injury if not handled properly. During removal, take breaks as needed to avoid fatigue and ensure you maintain safety. After the tiles are removed, you’ll be left with adhesive residue. To remove this, use a floor scraper, and for particularly stubborn spots, a heat gun can help soften the adhesive, making it easier to remove.
Vinyl and Laminate Flooring Removal
Vinyl and laminate flooring may seem simpler to remove than tile, but they come with their own unique set of challenges. For vinyl flooring, begin by using a utility knife to carefully cut the material into manageable strips. If the vinyl is glued down, it’s important to apply an adhesive remover or solvent to loosen the bond without causing damage to the subfloor. The solvent will help lift the material away with less effort, but be sure to follow the manufacturer's instructions carefully.
Laminate flooring often consists of interlocking planks that snap into place, so to begin removal, pry up the edges of the planks with a crowbar or pry bar. It's crucial not to force the planks, as this could cause them to break or damage the subfloor. Work your way around the room, removing one plank at a time. With laminate, the process is usually quicker, but you should still take care not to damage the subfloor beneath, especially if you plan to reuse the planks.
Removing Adhesive and Cleaning the Subfloor
After removing the flooring, you’ll likely be left with leftover adhesive, nails, staples, or other debris that must be cleaned up to prepare the subfloor for new flooring. The best way to tackle this is with a floor scraper, which can remove most of the remaining adhesive residue. Scrape slowly and carefully to avoid gouging the subfloor. For nails or staples, be sure to use pliers or a claw hammer to pull them out completely. It’s crucial to remove all debris before proceeding with the next step of your project. For any stubborn adhesive that resists scraping, try applying a solvent or adhesive remover.
These products are designed to break down and soften the glue, making it easier to remove. Always test the remover on a small area of the subfloor to ensure it won’t cause damage. Once the adhesive is completely gone, ensure the subfloor is free of debris and smooth, ready for your new flooring installation.
Conclusion
In the end, flooring removal is all about preparation, patience, and care. Whether you’re tackling carpet, tile, vinyl, laminate, or hardwood, it’s crucial to use the right tools, work in a safe environment, and take your time to avoid accidents or mistakes that could complicate the process. The key to a successful removal lies in understanding the type of flooring you’re working with and following the correct procedures for each material. While the process may seem tedious or overwhelming at first, it becomes much more manageable when you break it down into smaller steps.
With the right techniques, you'll find that flooring removal can actually be a rewarding part of your renovation journey, and it opens up the opportunity to start fresh with new, beautiful flooring. If you ever feel unsure or need professional assistance, don’t hesitate to reach out. Lasso & Load Junk Removal is here to help with all your flooring removal and junk removal needs. Contact us at 404-227-2017 or email Lauren.renwickk@gmail.com for expert service and peace of mind.