How to Plan for Shed Demolition and Cleanup
Embarking on a shed demolition and cleanup project is more than just knocking down a few walls—it's a process that demands strategic planning, the proper tools, and a clear understanding of each phase involved. Whether you're aiming to make room for a modern upgrade, reclaim backyard space, or remove a neglected structure that’s become an eyesore, this task isn’t something to take lightly.
From assessing the condition of the shed to mapping out how to handle debris disposal, every detail matters. With a bit of foresight and preparation, you can take control of the process, minimize risks, and get the job done efficiently. This guide is designed to help you understand the ins and outs of shed demolition and cleanup so you can move forward with confidence and clarity.
Understanding the Scope of the Project
Before you even think about picking up a hammer, understanding the scope of your shed demolition project is vital. Take a close look at the shed's size, structure, and overall condition. Is it a basic wooden shed, or does it include more complex elements such as electrical wiring, plumbing, or a concrete foundation? If the shed is simple and just built from wood or metal, it might be suitable for a DIY project. However, if it includes features like wiring or plumbing, the project becomes more complicated, and professional help may be required.
Additionally, assess the overall safety of the structure. Is it rotting, leaning, or showing signs of severe damage that could make the demolition more hazardous? All these factors play a role in determining whether you should take the DIY route or hire experts. The more comprehensive your initial assessment, the better prepared you’ll be to tackle the task ahead, ensuring the project goes smoothly from start to finish.
Obtaining Necessary Permits
Before you start tearing down your shed, it’s essential to check with your local municipality to determine if you need a demolition permit. Local regulations differ significantly, and some areas require permits for even minor demolition projects, especially if the shed is attached to a foundation or has utilities connected. Permitting processes ensure that the demolition is done in a safe and legal manner. Without the proper permits, you could face fines, delays, or even be required to undo any work you’ve done.
To avoid these issues, take the time to inquire about permits before starting your project. Even if your shed is small, it's better to err on the side of caution. Additionally, understanding the local regulations helps ensure you comply with safety standards, zoning laws, and any other specific requirements your area may have. Planning for permits early can help you avoid frustrating setbacks during the demolition process.
Disconnecting Utilities
If your shed has any connections to utilities like electricity, water, or gas, it’s crucial to disconnect them before demolition begins. Utilities can present significant safety hazards, and improper handling can cause accidents, fires, or flooding. Electrical wiring, for example, could still be live even if the power is turned off, posing a risk of shock. Water lines and gas pipes are particularly dangerous because, if not properly disconnected, they could result in leaks or bursts during demolition, potentially leading to costly repairs or dangerous situations.
Always call in licensed professionals to handle the disconnection of utilities. They have the knowledge and tools required to ensure everything is turned off safely and correctly. Never attempt to disconnect utilities on your own unless you are qualified and certified. Taking this precaution will safeguard both your home and the people working on the project, helping to ensure a smooth and incident-free demolition.
Clearing Out the Shed
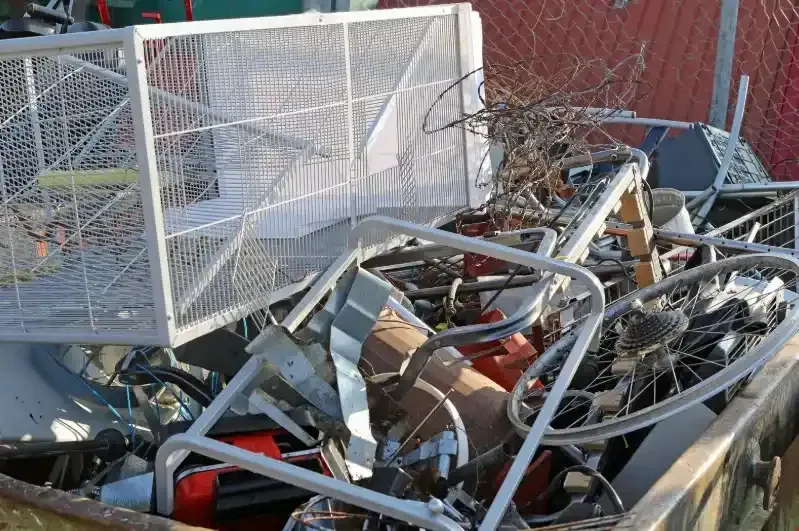
Clearing out the shed is one of the first critical steps in the demolition process. Before any demolition begins, you’ll need to remove all the items stored inside, whether it's tools, gardening supplies, furniture, or personal belongings. This step ensures that nothing valuable or sentimental gets damaged or discarded by mistake during the teardown. Additionally, clearing out the shed makes the actual demolition process much easier.
It creates more room to work and reduces the risk of tripping over obstacles or hitting objects with tools. Don’t forget to remove any debris that might be inside, such as old scrap materials, rusted metal, or broken furniture. Once the shed is cleared, also take a moment to clear the surrounding area. Remove any obstacles or hazards from around the shed so that you have a safe and organized workspace for the demolition.
Gathering the Right Tools and Safety Gear
The right tools and safety gear are non-negotiable when it comes to shed demolition. Without them, you risk not only slowing down the process but also putting yourself in harm’s way. Start by gathering demolition tools such as a sledgehammer, pry bar, reciprocating saw, crowbar, and screwdrivers. These tools will help you dismantle the shed piece by piece. It's also important to have a tool for cutting through nails or screws, as they can pose a danger if left in place.
But just as crucial as the tools are the safety items you’ll need to protect yourself throughout the process. Wear gloves, safety goggles, and a hard hat to shield your hands, eyes, and head from debris. Steel-toed boots will protect your feet from falling objects, and a dust mask or respirator is important to prevent inhaling harmful dust or mold spores, especially if the shed has been neglected for a long time.
Planning for Debris Disposal
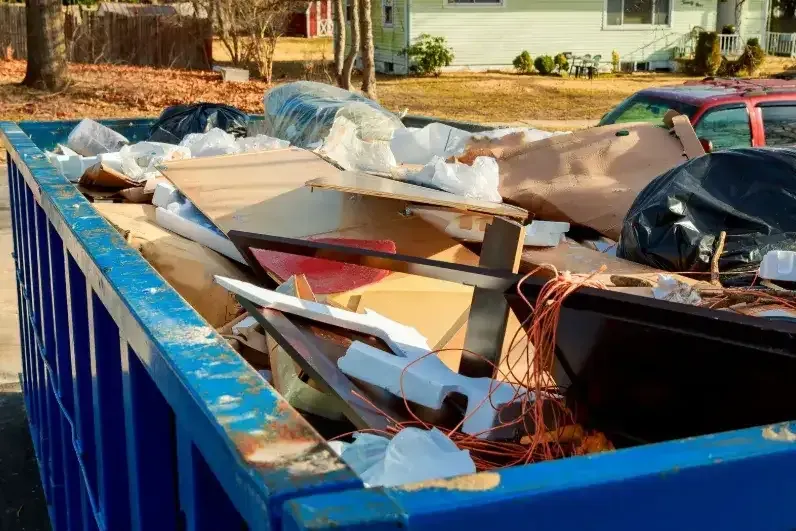
Demolition is a messy business, and a big part of planning your shed teardown is figuring out how to handle the debris. Once the shed is dismantled, there will be a significant amount of waste to remove, including wood, metal, nails, insulation, and potentially hazardous materials. The most efficient way to manage this waste is by renting a dumpster. A dumpster provides a central location for all your demolition debris, helping to keep the area tidy and preventing materials from piling up in the yard.
Typically, a 10-yard dumpster is sufficient for smaller sheds, but if you're dealing with a larger structure or have a lot of material to dispose of, a 20-yard dumpster might be a better fit. Planning for debris disposal in advance ensures the site remains safe and organized throughout the demolition process, and it avoids last-minute scrambling when you’re ready to remove the waste.
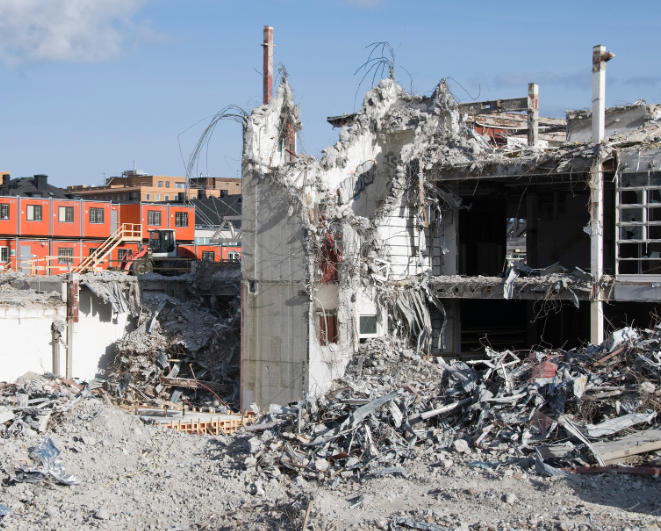
Executing the Demolition
The demolition process itself is often the most exciting part of the project, but it requires a methodical approach. Start by removing the roof of the shed, as this will relieve pressure on the walls and make dismantling easier. Once the roof is off, proceed to the walls, carefully taking down one panel at a time. Finally, tackle the floor. A top-down approach is effective because it ensures that the structure remains stable while you're working. Use the tools you’ve gathered to pry apart nails, screws, and other fasteners.
As you work, be mindful of the surroundings—protect nearby structures, trees, or landscaping to prevent unintentional harm. Demolition can be physically demanding, so pace yourself and don’t hesitate to take breaks when needed to maintain focus and safety.
Handling Hazardous Materials
If your shed contains hazardous materials like asbestos, lead paint, or mold, proper handling is critical to ensure safety. These substances can pose significant health risks if disturbed, causing respiratory issues, skin irritation, or long-term illnesses. Always contact professionals who specialize in hazardous material removal to handle the disposal according to local regulations.
They will have the necessary training, equipment, and protective gear to manage these substances safely. Improper handling can lead to legal consequences and environmental damage, so it’s essential to avoid DIY attempts. Prioritize safety by hiring experts to handle these hazardous materials.
Cleaning Up the Site
After the shed has been dismantled and debris has been removed, thoroughly clean the site. Remove any remaining nails, screws, or sharp objects from the ground to prevent injuries. If the shed had a concrete foundation, decide whether to remove it or repurpose it for a new structure. Level the ground and consider reseeding the area with grass or other vegetation to restore the landscape.
Recycling and Donating Materials
Once the shed has been fully demolished, the next step is to clean up the site thoroughly. Begin by removing any remaining debris, such as nails, screws, or shards of broken wood that could pose a safety hazard. Carefully scan the area for any sharp objects that could lead to injury.
If the shed had a concrete foundation, you must decide whether to remove it completely or leave it in place for future use. After cleaning, level the ground and reseed the area with grass or other plants, restoring the landscape to its original condition.
Hiring Professional Assistance
Shed demolition can be a physically demanding task, especially if the structure is large or includes hazardous materials. If you’re not confident in your ability to handle the project yourself, hiring professionals is a smart choice. Experienced demolition companies have the right tools, equipment, and expertise to safely and efficiently tear down the shed.
They can also manage debris disposal, recycling, and hazardous material removal, ensuring the job is done safely and within legal guidelines. If you want to avoid the hassle and physical labor, hiring experts allows you to focus on other priorities while the professionals handle everything.
Conclusion
Planning for shed demolition and cleanup involves careful preparation, adherence to safety protocols, and consideration of environmental impact. By following the steps outlined in this guide, you can ensure a successful project that enhances your property and aligns with your goals.
For residents in Gwinnett County seeking professional assistance with shed demolition and cleanup, Lasso & Load Junk Removal offers reliable and efficient services. Contact them at 404-227-2017 or via email at Lauren.renwickk@gmail.com to schedule your p